
TFT Positioning Guide: Frontline, Carries and Counters

Positioning costs nothing, which makes it the cheapest upgrade in the game, and two identical boards can win or lose the same fight depending on where the units stand. Most of it comes down to targeting: once you know who hits whom first, the rest follows.
How units choose targets
The board is a grid of hexes, with four rows on your side. When the fight starts, most units walk to the nearest enemy and attack it, and switch targets when that one dies or moves out of range. Some units break the rule: assassins jump to the enemy's back line, and some abilities go for the farthest or the weakest enemy.
Pretty much every positioning decision comes from that. Whoever stands closest to the enemy takes damage first, and whoever stands farthest away gets to act the longest.
Frontline and backline
- Front row: tanks and melee units. They soak the first damage and hold the enemy in place.
- Back row: ranged carries and supports, out of reach while your front row holds.
- Middle rows: for units that need to reach the enemy fast, or to keep a gap between your carry and enemy assassins.
Make the frontline too narrow and enemies walk around it; too wide and your tanks end up standing alone. Most boards work best with the front row covering the side your carry is on.
Protecting your carry
A carry in a back corner is the hardest thing on your board to reach: enemies have to get through your whole frontline first, and only one side is open. That's why the corner is the default spot for ranged carries. Put a tank or a support next to it to take the hits aimed at that corner.
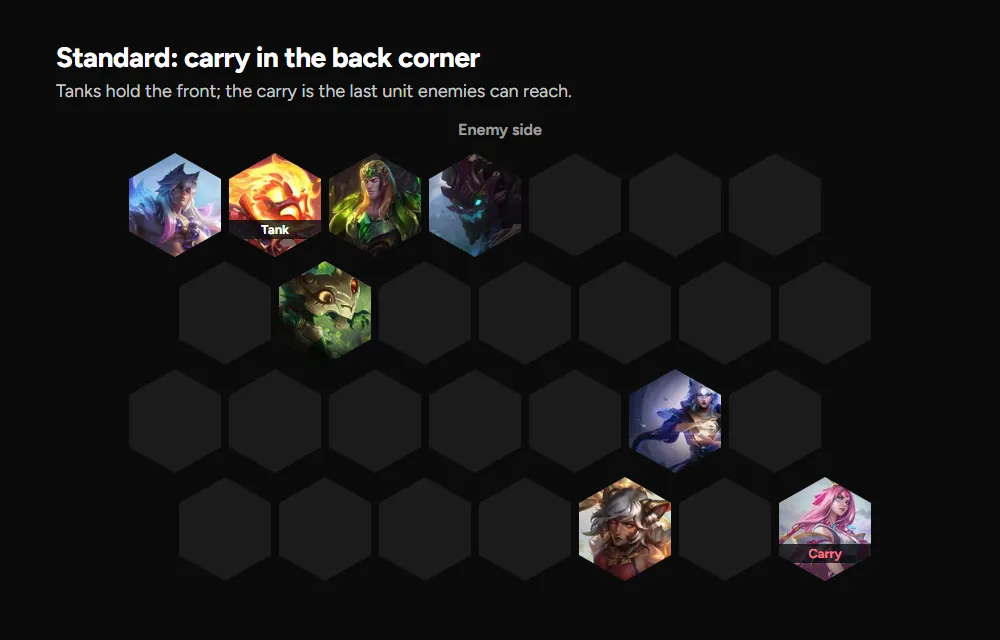
Melee carries are the exception. They need to reach the enemy, so they usually stand in the front or second row, next to the tanks that cover them on the way in.
Our comp guides show a full board for every comp. Start from that, then adjust for your lobby.
Answering common threats
Assassins
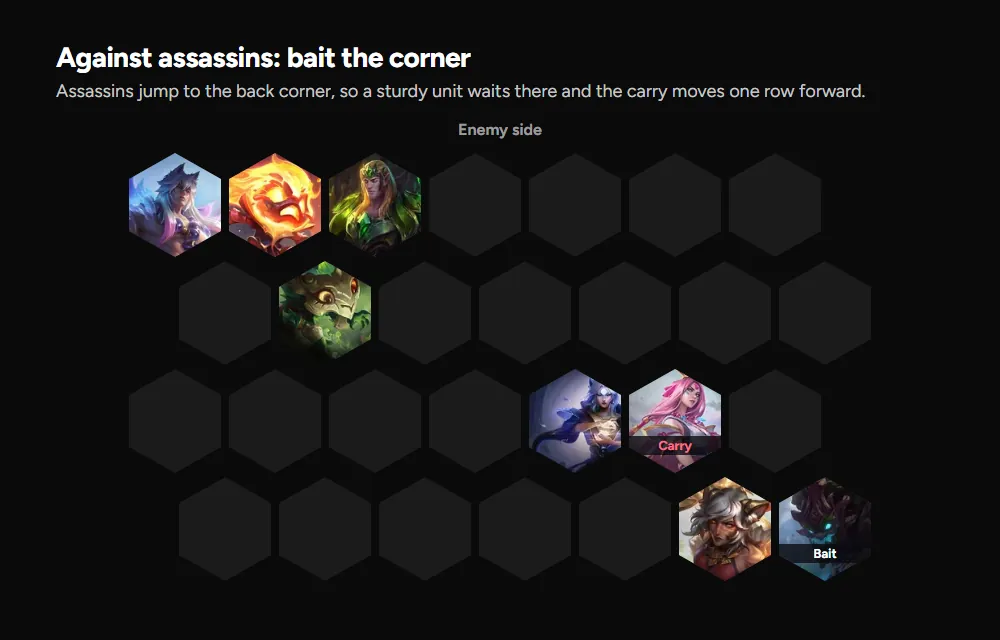
Assassins jump to the farthest back row. Against them, move your carry up a row and put a tank, or something you don't mind losing, in the corner as bait. The assassins land there instead of on your carry.
Area damage
Abilities that hit a group of hexes punish boards that stand bunched up. If the lobby has a lot of area damage, spread your backline out, even if your front gets a bit weaker for it.
Crowd control
Stuns and knock-ups usually land on whatever's nearest or most crowded. Keeping your carry away from the front row buys it time before anything reaches it.
Long-range carries
Some enemy carries can hit your back row from the very start. Against them, a sturdier unit in front of your carry, or on the side the damage comes from, keeps it alive longer.
Scouting and repositioning
Between rounds you can look at everyone else's board. Before the fights that matter, check the boards you're most likely to face: where their carry stands, whether they've got assassins, and which side their damage comes from. Then mirror it. Carry in the corner away from their biggest threat, your best tank across from their carry.
Tip Late in the game there are only a few players left and their boards barely change between rounds. A minute of scouting before each fight is often worth more than a reroll.
Keep reading
- Set 18 comp tier list: every comp with its board, items and game plan.
- Item tier list and augment tier list.
- All guides